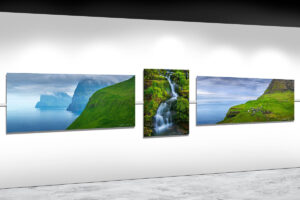
Create a Home Gallery Wall: A How-To Guide
DESIGN A HOME PHOTO & WALL ART GALLERY WALL Create a home gallery wall and make it look professional. Whether you use photography prints, or
How to hang photography prints, paintings, or any kind of wall art, like a professional? You are the proud collector of a newly acquired masterpiece artwork and now you need to hang it on a beautiful wall. How do you do that? What tools do you need? How do you ensure a proper wall mount? If this is you, keep reading for a step by step guide on how to hang wall art like a professional.
This article is a complete guide on the how-to steps of hanging art on a wall. It assumes that you have already made some interior design decisions such as: what artwork you are hanging, which wall will it be displayed on, and where on that wall it will be positioned. In other words, it is not meant to address the interior design aspect of hanging artwork on a wall. If you need help with some of those decisions, you might want to read these articles:
Interior Design With Nature Photography: Complete Guide
How to Choose the Right Print Size for Your Wall
How to visualize fine art prints on your wall?
When hanging any artwork on a wall there are two main parts you should not compromise on. First, the correct position of the artwork on the wall. Meaning, it is perfectly horizontally level, and aligned with any furniture or other wall decor. Second, a safe and sturdy mount installation which will ensure that the artwork will remain securely on the wall for as long as it is intended to be there.
Knowing how to correctly position the art on the wall is key when hanging it, in order for it to be perfectly level and centered. This section will walk you through the steps of how to ensure a correct position.
To ensure the correct position of an art piece when hanging it on a wall you have to consider three things. One, the vertical alignment of the artwork or, how high on the wall it should be. In other words, do you want it centered on eye level or aligned with furniture, or other decor on the wall. Two, the horizontal alignment or, how far left or right on the wall will the picture be placed. This is important when you want it dead center on a wall, or aligned with some furniture below it. Three, ensuring that the wall art is perfectly level horizontally. This may be the most important aspect of correct positioning when hanging wall art. It can be very disappointing to see a stunning image print on a wall, but mounted at a slight angle and appearing slanted.
Therefore, the very first step you need before mounting an art piece is to ensure that you know exactly where it needs to be on the wall.
The next step is to understand the hanging system, which will be used to hang your image. The hanging system will determine which approach you take in order to calculate the exact location of your wall anchors.
Let’s explain what is meant by an “anchor” when we hang wall art. An anchor means the actual hardware upon which the picture hangs. Depending on the hanging systems used it could be several things. For example the anchor could be a single screw or a nail, upon which a small frame hangs directly. It could be 2 screws, or nails, upon which the art hangs. In some cases the anchor is an actual hook (or two), which is fastened with a screw or nail. Yet, in other cases the anchor can be actual rail, which is fastened with screws to the wall.
If you calculate the anchor positions correctly, you are halfway through to ensuring a proper mount of your wall art. You will want to create small pencil marks on the wall to know exactly where they need to go. I recommend making a small “+”, as you mark each spot on the wall. That way you can precisely position the point of every screw that will hold your art. Please note that the calculation process will vary depending on the hanging system used. This is explained below in detail.
The approach you take here will depend on the wall art hanging system, as explained below. The tools you will need are: pencil, measuring tape, and a level. I strongly recommend a laser level.
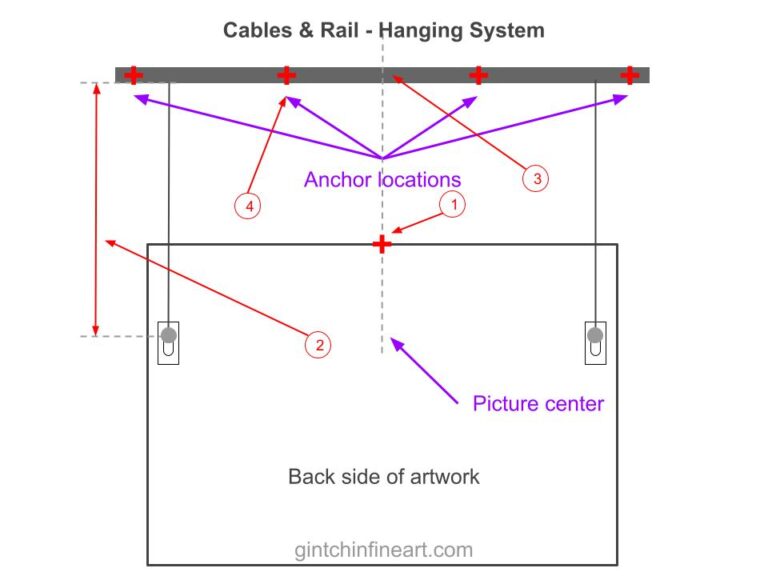
This hanging system is one of the easier because it gives you a lot of flexibility for adjustment after it has been installed. Because of its design you can easily reposition your wall art, both vertically and horizontally, after it has been hung.
1.) Mark the wall with a “+” where the top-center of your wall art will be.
2.) Ensure that the total length of your cables can reach from where the rail will be, down to the picture hardware. NOTE: I recommend that the rail be mounted all the way to the ceiling, so that it is not distracting.
3.) Use the laser level to find where the center of the rail needs to be.
4.) Hold the rail on the wall and use the level to make sure it is perfectly horizontal. Then mark the holes where the anchor screws will go later.
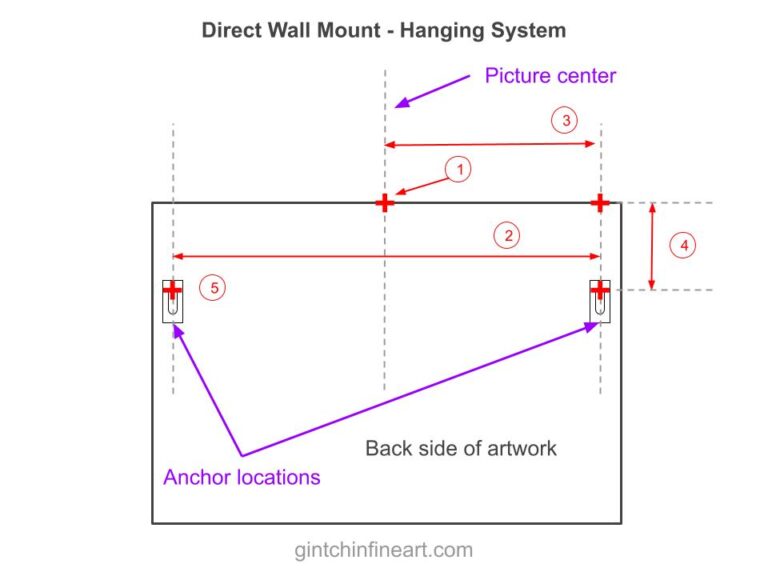
Thi is the hardest type to get right, but if you follow the steps below you will be successful.
1.) Mark the wall with a “+” where the top-center of your wall art will be.
2.) Measure the exact distance between the hanging hardware. NOTE: Measure the distance center to center of the hole. You have to be very precise here because sometimes even a ⅛ of an inch error will cause your wall art to be slanted.
3.) Measure horizontally half the distance, from the previous step, from the top-center to the right and place another “+” on the wall. Use your level to ensure a perfect horizontal.
4.) Measure the distance between the top of the artwork and the hanging hardware hole. Then apply that distance from the previous “+” mark and go straight down, to pencil in another “+”. This is where your first anchor screw will go in later. Again, use your level to ensure a perfect vertical.
5.) Use your measure and go left, from your last “+”, exactly the distance that you measured in step 2.). Then mark another “+”. This is where your second anchor screw will go in. It is critical that this “+” and the one from step 4.) are perfectly aligned horizontally. If not, your art will hang at an angle.
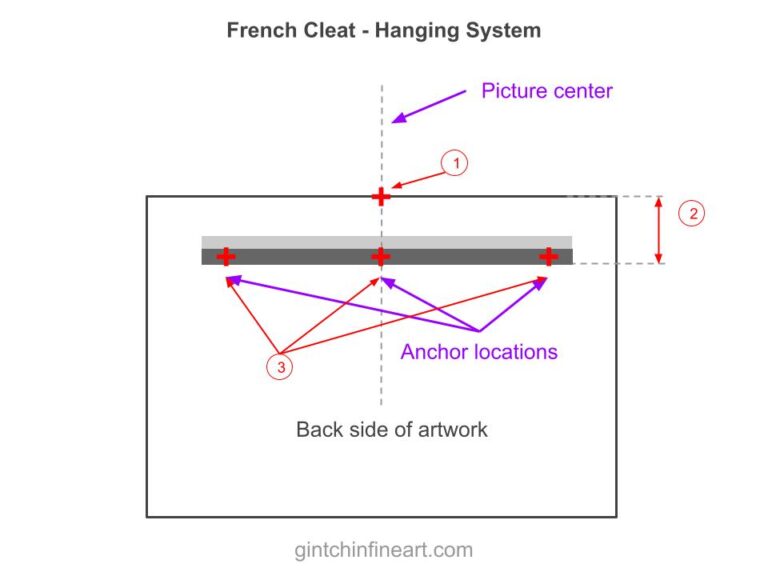
The French Cleat system is also not very hard to calculate for.
1.) Mark the wall with a “+” where the top-center of your wall art will be.
2.) This hanging system has 2 rails. One should already be attached to the back of your art, and the other should not. Take the unattached one and place it in a lock position with the mounted one. This is how the two will be when the art is finally hanging on the wall. Once you have placed the two together on the back of the frame, measure the distance between the top of the frame and the bottom of the rail.
3.) Place the loose rail on the wall, below the “+” you created in step 1.), and make sure its bottom is exactly the distance from it that you measured in step 2.). Use your level to make sure it is perfectly horizontal and mark the holes on it where the anchor screws will go in later.
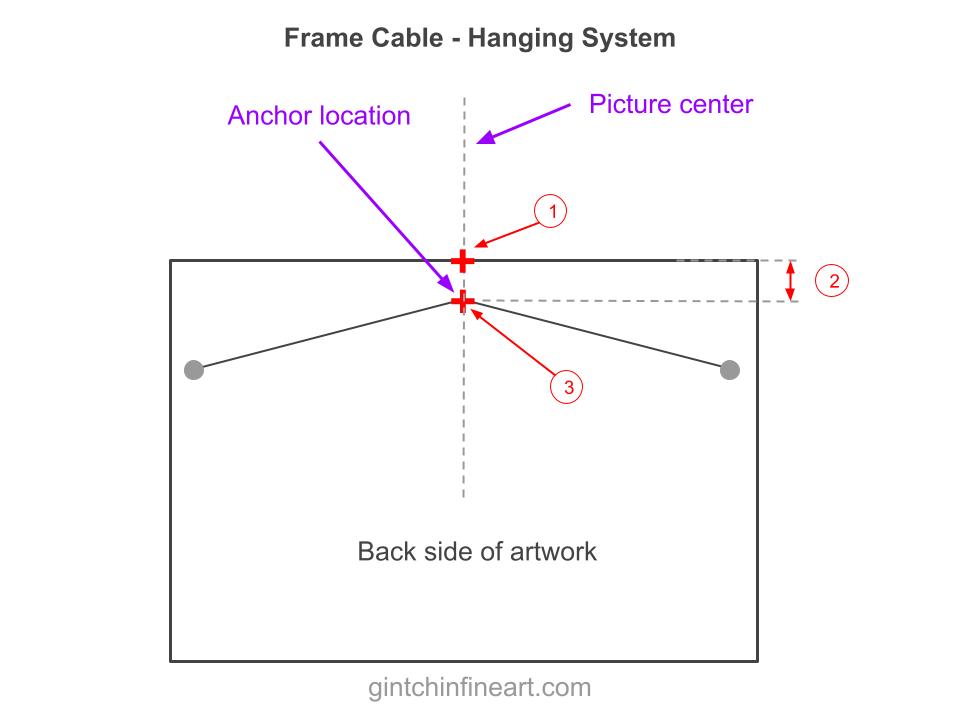
The Frame and Cable hanging system is probably by far the easiest to mark and install.
1.) Mark the wall with a “+” where the top-center of your wall art will be.
2.) Pull the cable with your hand, towards the top-center of the picture, and measure the distance from there to the top of the frame.
3.) Measure that same distance from the “+” you created in step 1.), and mark a second “+” directly below it. This is where your anchor screw/nail will go in later.
By now it is assumed that you have already marked the exact spots on the wall where the art will be hung. Therefore, all you need to do is secure your anchors and hang your new masterpiece.
One of the most important things when you hang wall art is knowing how to safely secure the anchors. Failing to properly secure an anchor can result in the artwork falling off the wall. In most cases this will end up damaging the art. A fallen wall art can also damage nearby furniture and/or other decor. What would be worse however, is if the artwork was above a sofa or a bed and hit a person on its way down. Therefore, be sure to use the right hardware, tools, and execution in order to ensure that picture stays securely on your wall.
Disclaimer: I have successfully hung large and small wall art prints in art galleries, homes, and corporate offices. My experience spans many years and now I am sharing the lessons I have learned along the way. However, I am not the standard on how to securely hang wall art. Therefore, you should ensure that you read hardware manufacturers instructions, and use proper tools and skills in order to securely hang wall art.
In addition, it is important to understand that the type of wall determines how we hang the wall art, and the tools and hardware that we use. Therefore, let’s look at some of the most common examples.
Drywalls are the most common type when hanging wall art. Drywalls are also the weakest structures, which makes it all the more important to secure the artwork anchors well.
HARDWARE
Although nails are quick and easy to use on drywall, I would not recommend them unless they are used with a hook anchor and are meant for a small picture. On the other hand, screws can provide a more secure anchoring mechanism, especially when used with a drywall anchor. A crew and a drywall anchor is my preferred method when hanging wall art on drywall. Every drywall anchor manufacturer specifies the maximum supported weight, which is very helpful. I always like to use anchors that can support more weight than the actual artwork.
TOOLS
If you are using nails, the only tool you need is a hammer. If you are using screws, I recommend a hand screwdriver and NOT a powered drill. The reason for that is the softness of the drywall texture. Screws into a drywall should be snug but not overtightened. When you use a powered drill it can be very easy to over tighten and destroy the integrity of the wall, which would lead to a compromised anchor. In addition, you may need a stud finder as well.
EXECUTION
When hammering a nail, hold it steady onto the drywall and gently tap with the hammer. Once it is snug, stop hammering so that you do not ruin the drywall. This should not require much force.
When using a screw with a drywall anchor to hang wall art, I like to make a small hole in the wall first. You can do this by pressing the tip of your phillips screwdriver into the wall and spinning it back and forth a few times. This will create a small “well” where you will then place the tip of the anchor and drive it in with your screwdriver. To do that, first push it into the wall with the screwdriver, so that it can “bite” into the wall, and then start screwing. Do NOT overtighten.
If you hit a harder surface inside the wall, while driving a nail or a screw, you need to pause and find out what you have hit. It could be a stud, pipe, or a metal plate (which is sometimes used to protect electrical wiring inside your wall). If it is a stud, read the instructions below in the “Stud” section. If it is a pipe or a metal plate, you need to find a new position for your wall art.
Plaster walls have not been used for many years now. Unless you live in an older house, chances are that you will not have to work with a plaster wall when hanging wall art.
HARDWARE
You should be able to use both nails and screws here. If the nails are fastened to the wood part of the plastered wall, they would be able to hold more weight than nails in a drywall. Also, if you use screws into the wood, they would not need a drywall anchor. However, if your screws are fastened in the plaster only, you would need a plaster anchor first.
TOOLS
You would need a hammer if using nails. If you use screws and fasten them in wood, you should only need a power drill with a phillips screw head. However, if your choice is screws with plaster anchors, you will need a screwdriver, a power drill, and a proper drill bit. The packaging on the plaster anchor will give you the necessary drill bit size. However, as a general rule – you want the diameter of the drill bit to be slightly smaller than the one of the anchor, so that the anchor can fit tightly into the wall and hold your artwork securely.
EXECUTION
When driving a nail, just hold it steady and hammer with gentle force. If the nail hits the wood you will have to drive a little harder. If you use screws, I would recommend driving the screw directly into the wall with your power drill. If you hit wood, you probably do not need an anchor, unless your artwork is really heavy. If you do need a plaster anchor, you want to first drill the anchor hole. Then use the hammer to tap it into the wall. Be gentle because if you hit too hard and at an angle, you may bend the anchor and make it very difficult to insert. Finally, place the screw inside the anchor by using a hand screwdriver.
Hanging wall art on studs is one of the sturdiest approaches. If you are hanging a heavy artwork, or multiple pictures on the same anchor, this may be your only choice. For example, a rail that will hold multiple pieces of art will almost always have to be secured to the studs of a wall.
Furthermore, this section assumes that you have located the studs in your wall already. It also assumes that you have confirmed that what you believe is a stud is not a pipe, metal plate, or another object inside your wall.
HARDWARE
You can use small nails in a stud. However, I would stay away from hammering big nails into a stud because of the force that has to be applied. Therefore, I believe that screws without drywall anchors are the best hardware here.
TOOLS
Drill bit and a power cord with a phillips head. The drill bit diameter should be about ⅓ smaller than that of the screw.
EXECUTION
Drill the whole first and make sure your bit is long enough to penetrate both the drywall and the stud behind it. Then use the power drill to drive the screw into the stud.
Brick walls are less common when hanging art pictures. Nevertheless, many homes still have internal brick walls, especially around fireplaces. If you have decided to hang a picture on a brick wall, be sure that you have the right skills and tools, as this is probably the hardest method.
HARDWARE
You can use specially designed screws, or you can use specially designed wall anchors and then screw into them. Be sure to read the packaging of your hardware to ensure it can be used in bricks.
TOOLS
You will need a power drill and the type of head/s that your screw/s have. In addition, if you use wall anchors, you will need a drill bit, designed for bricks. Finally, you will need a hammer to drive the wall anchors in.
EXECUTION
Using a hammer-action speed, drill to create a hole in the brick. It is important to use a bit diameter slightly smaller than the screw or the wall anchor, whichever you are using. Another important part is to make the hole slightly deeper than the length of the screw. Tap the anchor inside the brick with your hammer. Finally, use a hand screw driver to insert the screw into the wall or the anchor.
This article has been referenced on Porch.com
Gintchin Fine Art offers a 30 minute no-obligation complimentary art consultation. Having designed and built gallery walls in home, office, corporate, and art gallery interiors I can help you make the right choice. If you need advice on choosing the right photograph, print size, print medium, frame option, hanging system, etc. I can help. Take advantage of my experience and skills, and request your no-pressure art consulting session today.
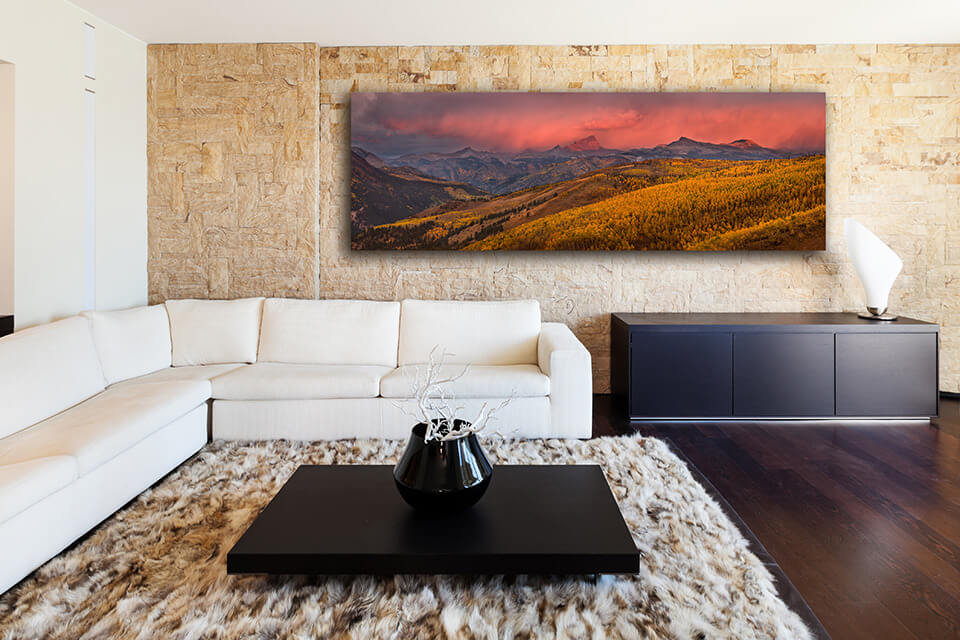

DESIGN A HOME PHOTO & WALL ART GALLERY WALL Create a home gallery wall and make it look professional. Whether you use photography prints, or
HOW TO SELECT THE BEST WALL ART HANGING SYSTEM Knowing how to choose the best hanging system is important when you hang a photo print,
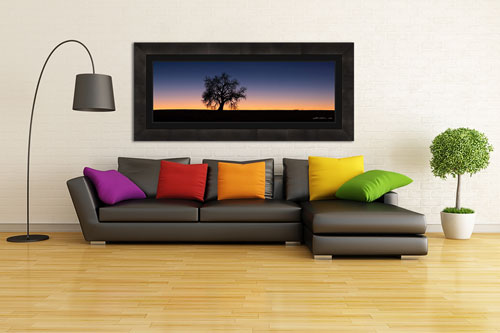
How do you choose the right frame for a landscape print? Mounting a high quality frame around a landscape print can create an impressive piece

The ability to visualize art prints on your wall before buying is a skill that can save you headaches. Whether you are an art curator,

Whether you are an interior designer or an art collector, you have decided to use fine art nature photography for interior design. Your goal is
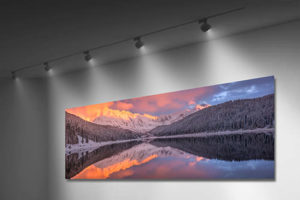
How to Light Fine Art Photography Prints and Wall Art Knowing how to light artwork in your home or business can be the difference between
Gintchin Fine Art offers exclusive limited edition fine art photography by Lazar Gintchin, a nature and landscape photographer specializing in large format size prints. Each image in Gintchin’s portfolio is a unique and limited edition print. The gallery includes high-quality wall art prints in acrylic and metal mediums, providing a luxurious fine art presentation. With a diverse range of genres to choose from, art enthusiasts can curate a collection that reflects their aesthetic preferences.