Knowing how to light artwork in your home or business can be the difference between bringing it to life, or not. Whether you are a fine art collector or just purchased your first fine art masterpiece, you need to understand photo prints illumination. In this complete guide I will educate you on what to consider when lighting photo prints. You can also use this information to make decisions on lighting any type of wall art.
There is no point in buying an expensive piece of photographic fine art and hanging it in a dark room. Any art, whether a painting or a photograph, created by a serious artist contains much in it. It contains details, shapes, and colors, which the artist intended to be found in the image. Many of those can be lost when the fine art is displayed in a poorly lit area. Quite the opposite, when properly illuminated a fine art photo print can shine in all of its glory. It can be seen exactly as the photographer intended it. In other words, careful lighting can bring a masterpiece to life.
Although photography prints look quite stunning in direct sunlight, you should avoid using sunlight for photography art illumination. Fine art can, and will, be destroyed by direct sunlight given enough exposure. Sunlight renders colors very accurately and emits across the entire visible spectrum of light. The issue is that it also emits light outside of the visible spectrum. That includes ultraviolet and infrared light. Both of these will deteriorate the colors and quality of a photo art print (see Art and Energy Conservation section lower on this page).
Because of the damaging effects of UV and infrared light, it is recommended that you consider the location of your new fine art photo print. North facing windows will minimize or completely avoid direct sunlight, depending on your geographic location. Therefore, bear in mind your home’s orientation. Additionally, examine the orientation of the windows inside the room where you hang your art piece.
When lighting nature photography prints you have to be aware what light is already available in the room, where the art will be displayed. Ambient light inside a room is the amount and type of light already present there, before we add more light. It is the foundation of the room light, upon which you will build in order to illuminate your new fine art. Remember to consider the ambient light for two reasons: light intensity and color temperature.
The intensity of the ambient light in the room will dictate the intensity of the light illuminating the art. A weak ambient light may not require an intense art illumination light. On the other hand, a bright ambient light may require a more intense art illumination. Or, it may not require one at all.
If the ambient light’s color temperature is incorrect for art illumination, it may affect the photo print negatively. This will be exacerbated if the ambient light will directly land on the art print. Therefore, understanding this light interaction can help you make the right photo print lighting decisions.
How intensely you should illuminate fine art nature photography prints depends on several components. Many sources suggest a 3:1 ratio between direct and ambient light as the most common rule. In other words, the art piece should be lit up 3 times brighter than the rest of the room. Others suggest that a too brightly lit wall art may be perceived as intrusive. In my opinion the 3:1 ratio is a good basic rule, but should not be followed blindly. I would consider the following factors:
Many of the art illumination sources who suggest the 3:1 rule consider an art gallery setting. Art galleries are usually a bit darker than a normal home. This is done on purpose of course, so that all of the art can stand out. If you are considering the intensity of the art light for your home, you have to consider how dark/bright your home normally is. Some people do not mind a darker house. Others really enjoy a very brightly lit interior. If you are a person with a preference to darker ambient light, the 3:1 rule may work well for you. However, if you are the opposite, you would have to consider what it would take to illuminate your photo print 3 times brighter. Would that even be necessary?
Moreover, you should ask yourself if you want your art print to really stand out. If you prefer that it blends with the rest of the room decor, or additional photo prints, the 3:1 rule may not be ideal for you.
Depending on the light intensity, light angle, wall color, and wall texture you may get some wall glare. If your purpose is for the photo print to stand out, the brightness and glare of the wall may diminish this effect. For this reason, you may want to evaluate this also, as you decide how brightly to illuminate your photographic fine art. I explain this in more details lower on this page, in section Wall Color and Texture.
With art illumination the position of the light source plays an important role. In order to achieve the best results you need to put some thought into two variables. One is the distance between the light source and the photo print. The other is the angle at which the light is illuminating the fine art.
If you choose a short distance between the art print and the light source be careful to not cause heat damage. If you have selected a light bulb which emits heat, a short distance may not be recommended. You can easily check that by placing your hand in front of the photo print. If you feel heat you should probably consider increasing the distance or switching to a non-heat bulb such as an LED.
The angle of the light is actually quite critical. A small angle will cause unpleasant effects. On the other hand, a large angle will cause a problem as well.
Small angle: Too small (or a steep) angle can cause a couple of issues. One, the steeper the angle the longer the shadow of the print below it. This can look quite distracting and not very pleasing to the eye. Also, a very steep light angle can create an uneven illuminance. Meaning, the upper part of the print image may be brighter than its lower part.
Large angle: A large (or a gentle) light angle creates a brand new problem – glare. It is quite unpleasant and distracting to look at a wall art print, where you can see the reflection of the light in it. Sometimes you don’t see the reflection but a large bright spot instead, which is equally distracting. When that happens it is almost impossible to see the image in that particular spot. The effect of a large angle becomes even more important when your fine art print has a glossy finish.
Recommended angle: I am not aware that a magic angle exists to completely eliminate the undesired artifacts produced by large or small angles. However, most sources recommend a light angle of 30% in order to achieve the optimal effects of fine art lighting. The chart below can be used as a guide. It factors both the ceiling height and the light distance, in order to give you the 30% angle in various geometric scenarios.
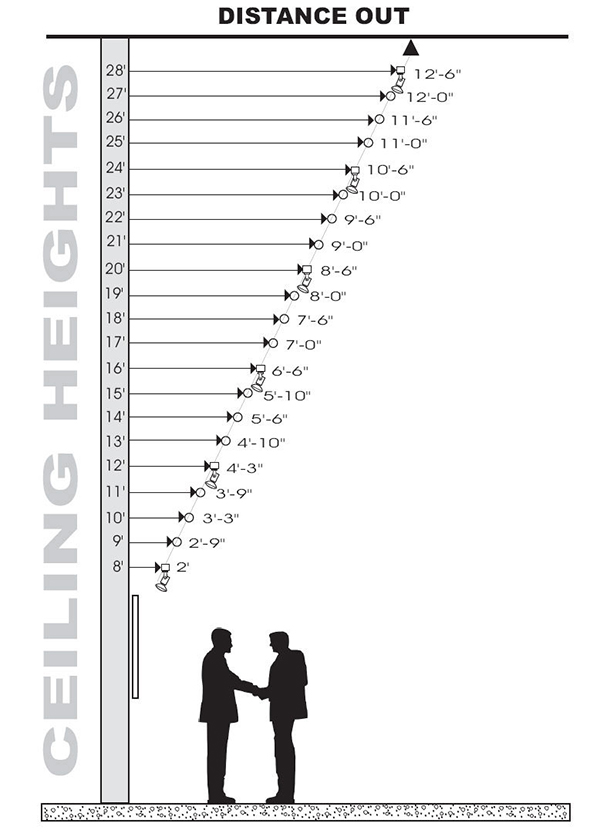
Image source: lightology.com
Understanding the beam spread of your lights will help you make the best decisions during art illumination. The spread of the light source is how the light increases in diameter with distance. This means that the further the photo print from the light source, the wider the illuminated area will be.
When lighting fine art photography prints the goal is to illuminate as much of the print as possible, while spilling as little light outside of it as possible. Unless you use light projectors you will always have to sacrifice one or the other. Most light bulbs have a fixed beam spread (ColorView LED Artlight is an exception) and you may need to do some calculations to understand the best position for your lights. The image below will help you with that.

Image source: Total Track Lighting
Besides the beam spread of your light and the distance of the light source you will need to consider some other elements. One of those is the physical dimensions of your fine art photo print. Another one is how many bulbs do you plan to use. Considering all of these variables will help you get the best illuminance coverage.
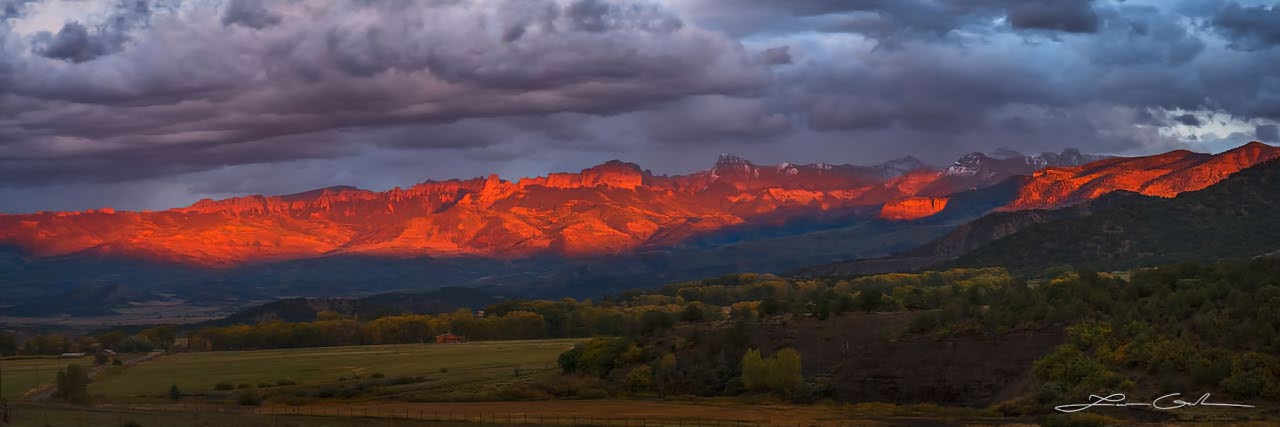
Instead of evenly illuminating the print, you can also take a less conventional approach. Let me call it “uneven illuminance”. This means that you will target to highlight certain part/s of the image and will leave others darker. You could do this to create a more dramatic effect by illuminating the brightest parts of the print. The image below could work well with uneven illuminance and a narrow beam.
However, if you do decide to pursue this route be mindful of two things. First, this technique will not work well on just any image. You will reap its benefit on contrasty images, like the example above. Second, if your lighting setup is more prone to light damage (see section Art and Energy Conservation below), you may face undesirable long-term results.
Art illumination has become more sophisticated in recent years dues to the advancements of light technology. For a long time bulbs were incandescent. Then we had fluorescent and halogen ones. In most recent years the LED technology seems to have gained tremendous speed and popularity. But what is the difference among all these light bulbs and how do they affect your photo print? This section will examine that question.
Before we dive into the details however, I need to mention the importance of Color Temperature and Color Rendering Index (CRI). Regardless of which bulb you choose, it is critical that you understand how they affect the final appearance of a fine art photo print.
Incandescent lights are probably the oldest lighting technology and the one most common to people around the world. While they may be initially less expensive, in the long run they cost in energy efficiency. In addition, they tend to have a rather warm color temperature. Therefore, they end up bringing out the yellows and reds in the photo print, while flattening the blues and greens. In my mind this creates a rather poor lighting experience for any fine art and I would not recommend this choice.
Fluorescent lights while more energy efficient have poor color rendering capabilities. They emit only a small portion of the visible spectrum. As a result, your photo print colors will not be very accurate. Additionally, fluorescent lights emit ultraviolet (UV) rays which can have a long-term damaging effect on photographic prints, or art in general. I would not recommend fluorescent bulbs for fine art illumination.
Halogen lights have great color rendering capabilities and for a long time had been the preferred choice by artists and gallery owners. However, while these lights do a great job of illuminating fine art photo prints, they have 3 shortcomings. First, they can get quite hot and if not placed far enough may produce heat damage to the print. Second, they do emit some ultraviolet (UV) rays, but this can be mitigated with a filter. Third, they are probably the least energy efficient choice.
LEDs would be my first recommended choice for landscape photography prints lighting, or wall fine art illumination. LEDs are the most energy efficient. They do not produce heat. Furthermore, LEDs emit virtually no UV radiation (below 400 nm) and very little infrared, both of which are damaging to exposed art.
When LEDs first came out they mostly emitted cool light which was far from ideal for art illumination. However, this technology has made tremendous progress in recent years. Today you can find LED bulbs with great illumination and color rendering capabilities.
Light projectors in this case are more sophisticated bulbs. They have optics and additional components inside them, in order to control the light. Sometimes they are also referred to as Optical Framing Projectors. This is because of their ability to custom frame the light around the fine art. Why does this matter? It matters because now you have the ability to illuminate just the photo print without spilling any light outside of it.
Unless you use a light system that allows you to completely control the light beam, light will always spill outside the art print. You can avoid this with any bulb which has a narrow beam. However, in order to achieve that you may only need to illuminate parts of the print. Therefore, the only way to fully illuminate the entire print and not spill light at the same time is with a framing light projector.
Recessed lights will usually be hidden in the ceiling. There are many different types of recessed light fixtures. The important part to remember is that you need directional or adjustable ones for lighting photo art prints. Otherwise you will end up casting the light vertically, instead of at an angle. This will have two negative impacts. One, you will not get the full illumination effect from the light, because it will be pointed downward. Two, the light will have to be positioned rather close to the photo print, which will result in a long shadow beneath the art.
Track lights are probably the most versatile option when it comes to photo art prints illumination. They allow much flexibility for positioning of the lights without any additional electrical or drywall work. In addition, they provide great control for the light beam angle. Finally, this is the best option if you ever move your photo print, or replace it with a different one. These capabilities give you (the art collector) many choices for how to control the light that best suits your taste.
Picture lights are a slightly more unique option. Why do I say that? They remain physically closer to the photo art, compared to the other two types of light fixtures. That means that their mounting and wiring approach is different. For these reasons, you have to consider the following:
Mounting: Depending on the model, the light fixture will mount on the wall or the art itself. There are even differences in how it mounts on the art. Some use screws, which would not work for any type of a print medium. It may be necessary that the print be framed in order to accommodate certain types of picture lights. Therefore, if you are considering this option, make sure you understand how it will mount to your fine art photo print.
Wiring: These lights require electricity to be available right behind the wall art. If you don’t have that on your wall you will need to decide if it is something you want to invest in.
Visual: The third variable to consider is visual aesthetics. Because of the design of this fixture, its proximity to the photo art print is rather close. This means that when you look at your fine art, the light itself will also be in your view. You have to decide if this is something you are ok with. Granted, these lights are very unobtrusive and minimal in size. Nevertheless, they are there and visible. Unlike recessed or track lights, which usually will be out of view, you will see the picture light.
Shadow: Given that the light is positioned almost vertically above the image, it will cast a long shadow. With this type of light there is not much you can do about the light angle. Therefore, you have to keep that in mind.
Illumination: If you have a long vertical landscape photography print, most likely the illuminance will not be evenly distributed across the entire art piece. While this may be just fine in some cases, in others it may not work very well, especially if you want to brighten the bottom part of the photograph.
There are so many choices for both light bulbs and light fixtures, when it comes to lighting landscape photography prints. Below you will find some of those options, which should be sufficient for any scenario. However, this is not an exhaustive list of vendors and you may consider doing your own research.
Light bulbs
Recessed lights
Track lights
There are many companies which service museums and galleries around the world, several of which are listed above. In addition, some consider these four brands to offer museum quality track lights:
Light projectors
Picture lights
Improper lighting of fine art can definitely damage it and shorten its lifespan. However, it is important to note that different factors play into this equation. For example, exposed art such as an oil painting or an unprotected paper print, would be more susceptible. In comparison, photo prints with UV protection, such as TruLife acrylic or metal prints would be less susceptible. Nevertheless, even protected fine art photography prints are not immune to light damage. For this reason, I would like to cover some important information in this section.
The first thing to know is that direct sunlight is by far the most damaging to any form of art. Because of this, I would not recommend to ever expose your fine art photo print to direct sunlight. This would be true, even if the print had the best UV protection on it.
Secondly, artificial light can also damage, although to a smaller degree compared to sunlight. Soraa’s Chief Scientist – Aurelien David has written a whitepaper which describes the three factors that determine the amount of light damage on art. In short, these factors are (in order of importance):
In recent years LED lights have penetrated many lighting applications. Art lighting, including museums, is one of those. They are an excellent choice for several reasons. They are energy efficient and long lasting, which is better for our environment.They produce virtually no heat, or UV/infrared light, which is better for the art they illuminate. Finally, today’s LEDs have superior light and color rendering capabilities, resulting in the illuminated photo print looking its best.
The wall color or its texture normally are not mentioned in articles about fine art photo print lighting. Regardless, I believe it is important to mention how both of these factors impact the final result of illuminating a photo art print. This especially applies when the art light is spilling beyond the boundaries of the art piece and onto the wall. Most times this is the case unless you use light projectors or do not illuminate the entire photo art print.
It is a known fact that darker colors absorb light and brighter colors reflect it. How does this matter when lighting fine art photography prints? The answer is – it does have an affect on how much the print stands out on the wall. For example, a lighter colored wall may require a brighter light, if your purpose is to really make the print pop. On the other hand, even a dimly lit fine art photography print will stand out more on a wall with a darker color.
The wall texture can become a distraction if it has a smooth and glossy surface. Usually the larger the light beam angle, the more pronounced this would be. The reason for this is that the wall will reflect any spilled light. Similarly, the reflection would be increased if the wall happens to be a bright color. If this is your wall, you may want to consider a smaller angle of light. In other words, a steeper light beam would help to decrease any wall glare. Alternatively, you may want to reduce the amount of spilled light. Ultimately, even a great photo print would not look aesthetically pleasing, if it is surrounded by noticeable wall glare.
It is highly recommended to hire a professional electrician for installing new lighting fixtures. Working with electricity can be dangerous, and a professional electrician will have the expertise to ensure safe and proper installation of the fixtures. This will help prevent any potential hazards and ensure that the lighting system functions correctly.
If you need additional help or evaluation for lighting your space, you can schedule a free, 15-minute lighting consultation with Gintchin Fine Art. We can provide guidance and advice on how to light your fine art. Alternatively, you can also connect you with a Lighting Consultant or Interior Lighting Designer if you require more extensive assistance.

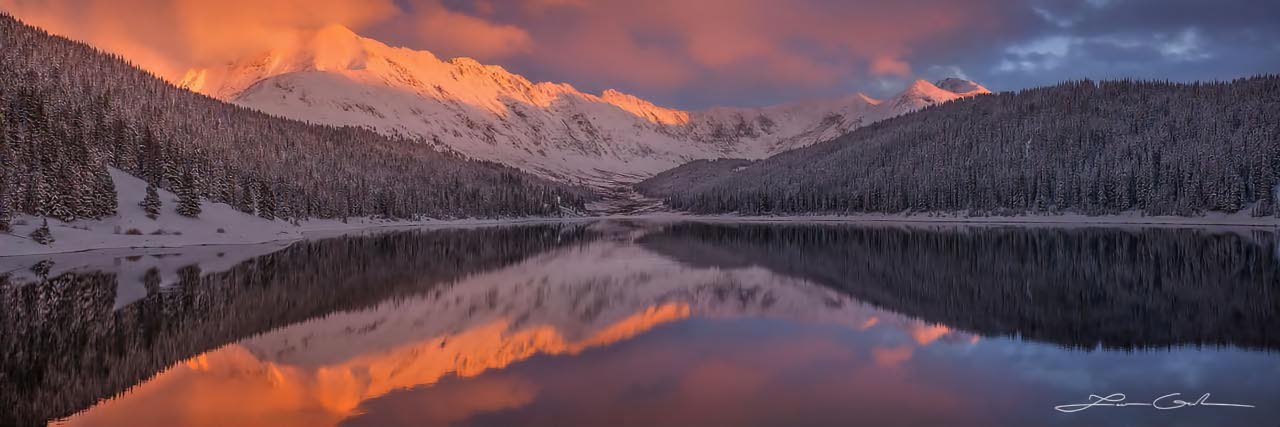
Sneffels Range Mountain Ranch | Ridgway, Colorado | LIMITED EDITION FINE ART PRINT 100